Delicious Pasta with Greens (and some reds)

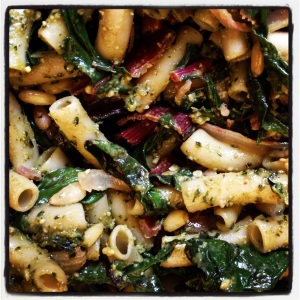
Brown Rice Penne with Pesto, Dried Cranberries and Pinenuts

Mmmm this was a total spur-of-the-moment invention and it turned out to be incredibly tasty! I was trying to use the last of my veggies from the fridge when planning what to cook for a friend for lunch. I had extra pesto and a big head of swiss chard I’d ambitiously bought at the farmer’s market and then had used only one leaf of in a smoothie earlier in the week. Inspired by this recipe I decided to mix the two. I find that the cranberries help to mollify the earthy-bitterness of the swiss chard, and the pinenuts add texture to the whole dish. Overall a great combination of flavors. Here’s the recipe:

Pesto with Swiss Chard, Dried Cranberries and Pinenuts

Serves 3-4

Ingredients:

Pesto (recipe here)

8 oz brown rice pasta (I like Trader Joe’s penne)

Swiss Chard

  • 2 tbsp olive oil
  • 1 bunch of swiss chard
  • ½ yellow onion, thinly sliced
  • ½ shallot, thinly sliced
  • 1-2 garlic cloves, crushed
  • 1 handful dried cranberries
  • 1 handful pinenuts

Directions:

(While you’re cooking the swiss chard, make the pasta.)

Chard:

  • Heat the oil in the pan, when hot, throw in the onions and the shallot.
  • Chop the stems of the chard into small pieces. Throw in with the onions and sautee for a  few minutes.
  • Add the crushed garlic, stir everything. Sautee for another minute.
  • Throw in the cranberries and pinenuts.
  • Slice the chard leaves into thin ribbons, add them in. Saute everything until the leaves are nicely wilted.

Now: mix the pesto into the pasta, then stir the pesto-ed pasta into the chard mix. Toss everything. Serve. Scrum-diddly-YUMptious.

Kalamata Olive Tapenade: A Belated Father’s Day Gift

Kalamata Olive Tapenade

A while ago my dad had this delicious olive tapenade at his house, (that, by the way, cost $8.50 for an 8oz serving), and it had the ingredients on the label. I thought I might be able to figure out the proper measurements and thus be able to make my own version, so I told him I’d try. 2 months later, voilà!

My Version of  Phoenix Pasta’s Olive Tapenade

  • 1 6.5 oz jar of Kalamata olives (I got mine at Trader Joe’s)
  • 2 tbsp olive oil
  • ½ tbsp balsamic vinegar
  • 2 garlic cloves
  • 1 tbsp shallot
  • sprinkle of thyme

Blend everything in a food processor. (This will be hard for my dad, since I “borrowed” his. Oops. Looks like I’ll be sending him a jar of tapenade.)

Eat with a flax cracker or something more delicious, or just your finger. Yum.

Delicious New Dessert Recipe: Banana Fudge Bars

Banana Fudge Square

I love it when I’m randomly experimenting with a new recipe and don’t expect it to be that great, and then it turns out to be crazydelicious. I know this sounds incredibly cocky, but seriously—I served it to some friends who had several helpings of the treat and agreed that it was amazing.

It’s pretty simple to make and very healthy. Here’s whatcha do:

Banana-Fudge Bars (This is not the most appropriate name, but I don’t know what else to call them, so this will have to do for now.)

Makes 9 bars

Ingredients:

Crust

  • 2/3 cup almond meal
  • 2/3 cup rolled oats (or for Gluten-Free: brown rice flour)
  • ½ banana
  • 5 figs
  • 1 tsp vanilla
  • 3 tbsp palm sugar
  • 3 tbsp coconut oil

Fudge Topping

  • 12 dates, soaked for 20 mins
  • 5 heaping tablespoons unsweetened cocoa powder
  • 1 tsp cinnamon
  • 2 tbsp agave
  • Berries

Directions:

Crust

  • preheat the oven to 350
  • In a food processor, blend the oats and the almond meal so that it’s all ground up in a fine powder
  • add in the palm sugar, blend
  • add in the banana, then the figs, one by one, until they’re nicely blended in
  • add in the vanilla and coconut oil. Blend everything until it is nice and moist
  • place dough in a square pyrex dish, flatten, bake for 15 mins
  • when it’s done baking, let it cool for a few mins, then place in the freezer to speed up the process so that it’s nice and cool when you spread the fudge on top

Fudge Topping

  • in a food processor, blend everything except the berries. If necessary, add more agave or cocoa powder, depending on how rich/sweet you like your fudge.
  • spread onto the crust
  • place in the freezer for 1 hour
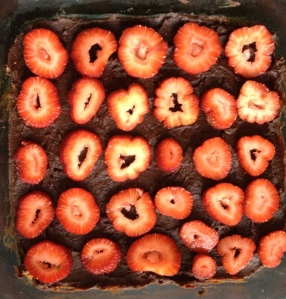
  • remove from freezer and place berries on top. I used sliced strawberries, but I’m sure any berry would be scrumptious.
  • Serve. YUM.

Dehydrating…again: Flax Crackers and Banana Chips

For my second dehydrating experiment I decided to make flax crackers, and I threw in some sliced bananas to see if I couldn’t make some tasty banana chips as well.

I soaked 1 cup of flax seeds in 2 cups of water, then mixed in 1 tbsp garlic and sprinkled in some cayenne pepper. My dehydrator seems to only have 1 dehydrator sheet, so I’ll have to figure out where to get more, because the other shelves are open grates and pouring any kind of cracker batter in would be quite difficult. In the meantime, I had to halve my recipe and in fact, even at half there was too much cracker-batter. Oh well.

After 4 hours of dehydrating, I was supposed to be able to flip the giant cracker but sadly it was only crusty about halfway through, so I peeled it apart and placed the hardened half on a holey-dehydrator shelf and hoped the still-wet other half would dehydrate properly during the next 6 hours.

Dehydrated Flax Crackers

The end result was strange, but I actually have no idea what flax crackers are supposed to look/taste like, so I’m going to assume they were perfect. However, even perfect, these crackers are decidedly NOT delicious. I’ll admit, the garlic and cayenne pepper wasn’t the best flavor choice, next time I might do something with rosemary…but even so, the texture is awkward and flax seeds have a kind of fishy-taste…so I decided to make use of them in a different way: fake tempura! Fishy? Check. Crunchy? Check. = tempura, right?

I made some sushi, broke up the crackers into thin strips, and threw them in. This added a really nice texture and flavor to my sushi rolls. Apparently flax crackers last FOREVER, literally, so I’ll have fake-tempura sushi for years to come, since I managed to fill 2 tupperware with the crackers and only a little bit goes into the rolls.

“Tempura” Sushi

I may also try dipping the crackers in something that will either mask or compliment their strange flavor…to be seen.

The banana chips were ok flavor-wise, but the texture is very chewy and they really stick to your teeth. Think they may be best used broken up and thrown into granola. Also to be seen.

Banana Chips

More dehydration experiments to come.

Ch-Ch-Ch-Chia!

Chia Tapioca with Strawberries

The other evening, when unable to decide what to make for dessert, I turned to my favorite vegan cookbook, Piece of My Heart, for guidance. Because I didn’t have much time (and was feeling particularly lazy), I settled on her Chia Seed Tapioca, which is actually a breakfast recipe. The recipe takes about 2 minutes to prepare (mix chia seeds, nut milk, a dash of vanilla, cinnamon, salt and then refrigerate for an hour or more) and results in a fantastic dish—so incredibly healthy, and extra yummy with a bit of agave and fresh fruit on top. My dining companion had recently become dairy-free, but desperately misses yogurt. It was agreed that this could easily replace yogurt in the morning, although admittedly the texture is not as smoothe. Still. A close second, animal-free!

Here’s some info about why Chia Seeds are so amazingly good for you: Chia seeds are very high in anti-oxidants have more calcium than milk and are a complete protein. They will thus give you lots of energy and help you feel full for a long time after consumption. They are full of Omega-3 oil, otherwise not so easy for vegans to get. In fact, chia seeds are the richest plant source of omega-3 oil. For more info, click here.

YUM!


My First Attempt at a Raw Cake

Day 1

Once I borrowed the book “Rawsome” from the library and then it went mysteriously missing. Days after I finally paid the insane late fee, which was surely at least 3x the value of the book, it turned up. Typical. That was a year ago, and I have yet to cook one recipe from said book. Until now. Enter the dehydrator: My mom sent it to me, I was so excited, but it’s taken me a month to actually open the box. Finally I have, and the first thing it will be used for is the “Amazing Cake” from “Rawsome.” Sadly, I’m such an impatient cook and all of the raw recipes that require a dehydrator generally look like this: Soak x-nut over night. Dehydrate for 12 hours. Blend with a, b and c ingredient. Dehydrate for 12 hours. And so on. A 2 day process to make dessert! I grew up melting chocolate chips in the microwave and dipping pretzels in them for dessert, so needless to say, I’m more of an instant gratification kinda gal. But here I am, attempting something new. Almonds a-soakin’.

Soaking Almonds

Day 1, part 2

Almonds have soaked, it’s time to dehydrate! After much examination, it turns out this machine is so simple, all I do is plug it in and it starts. Here we go.

Almonds Dehydrating

Day 2

So I decided to do the soaking during the day, the dehydrating overnight so that I could make the dessert in the morning. I now understand why all the recipes suggest that you soak the almonds overnight and then dehydrate. That thing is not quiet. It is also against my nature to leave an appliance on all night long, but I keep telling myself, “it’s a dehydrator! It’s for raw foodies and other eco-conscious people! It must be somehow not an energy waster…?” (I don’t want to do any research to find out the contrary.)

Here are my dehydrated almonds:

Dehydrated Almonds

I have yet to understand why I actually soaked and then dehydrated them, but I’m sure there is some nutritious explanation.

I should note at this point, that technically this dessert is not totally raw. Had I gone out and bought raw cacao powder and not used vanilla extract, it would be. And I’m sure it wouldn’t be that different. Actually I’m just remembering that I had planned to grind up the raw cacao nibs I’ve had sitting in my cupboard for months to use as raw cacao powder but obviously forgot. Oh well.

I soaked the dates (a surprisingly short 20 minutes, compared to the almonds).

Dates Soaking

Then I used the food processor I “borrowed” from my dad to blend up the crust. Sadly, I have to admit, that while the Vitamix can do a lot of amazing things, blending up dough/crust/thick things etc is much, much easier in the large bowl of a food processor. Sorry, Vitamix, I guess you can’t do everything better than anyone else, but close. That being said, even with the food processor I had to blend the crust in batches and open it regularly to dislodge a chunk from the blade. As I was blending and digging, blending and digging, it became pretty clear that this recipe was probably too labor intensive for my regular cooking preferences. But it’s still fun to experiment!

Blending the Crust

After the crust was fully blended, (although I didn’t manage to “puree” it, as the recipe recommended), I smushed it into a dish, then covered it with sliced strawberries.
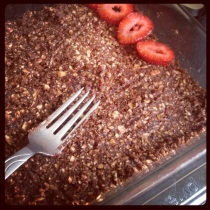
Crust

Crust with Strawberries

Then I blended the top layer. I’m really not sure what this was supposed to look like, or what consistency it should have had, because at this point I pretty much stopped measuring. It came out kind of moist and crumbly at the same time, and had a flavor similar to that of chalva (probably because the main ingredient was tahini). I spread this over the berries and officially finished my first (almost) raw dessert!
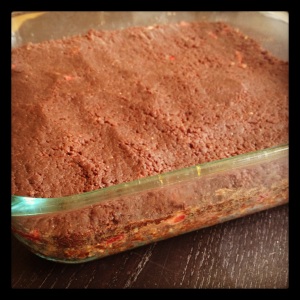
Amazing Cake!

Inside the Cake

Even though it was only 10am, I had to taste.

Slice o’ Cake

Just a sliver.

Supermega delicious. Quite possibly worth all the time and effort, which, in retrospect, wasn’t all that much.

Recipe: White Bean Hummus

You may be wondering, “Why bother making hummus from anything other than good ol’ chickpeas?” to which I’d answer…no particular reason, except to live a little! Change it up! And maybe you’d planned on making normal hummus but realized you were out of chickpeas and desperately needed a dip for your soon-to-be-arriving guests and…well, this is an excellent substitution. Also, white, or cannellini beans, are extremely good for your health. They are very low on the glycemic index, in fact they are lowest among all beans, which means that they metabolize slowly, and provide steady energy for hours after eating. They help reduce your risk for colorectal adenomas which could lead to cancer, they help your body detoxify, and they are very high in anti-oxidants. Yum and yum! So get those beans a-soakin’ and whip yourself up some delicious dip. Here’s how:

White Bean Hummus

Serves 4 (appetizer)


  • 2 cups white (cannellini) beans, cooked, or 2 cans (best if homemade)
  • 2 cloves garlic, crushed
  • juice from ½ lemon
  • 2 tbsp olive oil
  • ½ cup fresh cilantro
  • salt to taste


If you’re cooking the beans yourself, soak them overnight. Then rinse the soaked beans, put them in a pot and add water, so there’s about 2 inches of water over the beans. Cover, bring to a boil, then simmer for an hour or so, until beans are nice and tender. At this point, you can cool the beans in the fridge, or make the hummus and then cool it all once it’s done.

Blend all of the ingredients except for the cilantro.* Add the cilantro in last and blend on low, so the leaves get chopped and mixed in but not blended completely. Eat with your favorite dipping utensil. I like raw carrots or broccoli, or a brown-rice tortilla lightly fried in olive oil and cut into triangles. Yum!

*A note on cilantro (aka corriander). Some people do not like this herb, but if you do, or if you’re willing to give it another chance, do! It is soooo good for you and important for your health. It’s very high in iron and antioxidants, it aids in digestion, has a ton of vitamins, and it’s really good for your eyes! It protects against conjunctivitis (which, if you haven’t had it, is the absolute WORST), it prevents eye-aging (just imagine, if you eat enough, at 80 you’ll still have the eyes of a 20-year old!), and it soothes the eyes against stress. Oh and if this is a concern of yours, it helps to prevent and cure small pox. Just in case.

Recipe: Hazelnut Chocolate Chip Cookies

ImageI posted about loving hazelnuts a few weeks ago, and here I am with more hazelnut amazingness: a super easy, delicious and healthy recipe for Hazelnut Chocolate Chip Cookies. These crunchy little delights are vegan, gluten-free, sugar-free and superduper tasty.

Here’s whatcha do:

Makes about 10  cookies

Toast 1 cup hazelnuts–lay them flat on a baking sheet in the oven at 350 for about 15 mins. Meanwhile, get ready the following ingredients:

  • 1 cup brown rice flour
  • 1 tsp baking soda
  • 1 tsp vanilla
  • 1/4 cup coconut oil
  • 1/4 cup agave
  • 1/2-1 cup chocolate chips or chopped-up chocolate bar*

*in order for this to be truly sugar free, use unsweetened dark chocolate, or you can use Trader Joe’s “Simply Lite” Dark Chocolate.

-When the hazelnuts are done toasting, wrap them in a dishtowel and let them cool for a few minutes, then rub them inside the towel until most of the skin has peeled off. I’m not obsessive about getting all the skin off and so far it hasn’t bothered me at all. Obviously you should do what works best for your tastebuds. (Also, leave the oven on, as the cookies will be baked at 350.)

-Put the hazelnuts in a high speed blender or food processor and grind ’em up! It’s ok if they’re not completely powdered, I like a few larger, crunchy bits in my cookies, but once again, this is up to you.

-Now mix all the ingredients, starting with dry, then adding in the wet. Adjust the oil/agave based on how crunchy or chewy you like your cookies (the drier the dough, the crunchier the cookie etc.) Leave the chocolate chips/pieces for last.

-Take a spoonful of dough and roll it into a ball, then flatten it onto a baking sheet. Repeat this as many times as necessary until the dough is used up.

-Bake for 8-10 minutes.

-Let cool.

-Crunch (or chew, depending on your cookie consistency). YUM.

Ike’s Oats: Easy, Crazy-Delicious and Ridiculously Nutritious

While on a recent ski/snowboard trip, my Very Vegan Brother, Isaak, introduced me to a fantastic new oatmeal recipe for breakfast that is the perfect meal to start off a day that will require a belly full of energy-producing fare. Usually I start my day with a green smoothie, but before a big day of snowboarding, or maybe on a backpacking trip or something where you’ll be active pretty much nonstop, sometimes the smoothie just won’t cut it. Enter Ike’s Oats.

Now, this is not your everyday bowl of oatmeal with brown sugar, raisins, cinnamon, whatever. Isaak takes oatmeal to a whole new level and does it up savory, and damn he does it good. I’m obsessed. To start, decide if you want cashews or almonds, and, if you have thought of this beforehand, soak the nuts for an hour or so before consumption (or leave them soaking overnight so they’re all ready in the morning). Ok then in the morning, when you’re ready to eat, start by boiling some water. That’s really easy.  You then pour the boiling water over the oats (Isaak uses quick oats, you can use steel cut, rolled, whatever you love the most. Try them all!) and cover the bowl, leaving it for about 2 mins so the water is absorbed. Isaak recommends a 1:1 water:oatmeal ratio which also makes things really easy, as in, 1 cup of oats gets 1 cup of boiling water. When you uncover the bowl, the oatmeal should be fairly thick with no liquid apparent. Some people like theirs mushier, in which case, add some more water. Then comes the exciting part: (By the way: I am totally guessing on the measurements here, you can obviously add more or put in less depending on your personal tastebuds.) For every 1/2 cup oats used, put in 1 tbsp soy or tamari sauce, 1 tbsp nutritional yeast, 1 tbsp (or 3 generous squirts) sriracha, 2 tbsp nuts. Omg! Everything I love all in one hearty bowl.

Oatmeal on its own is soooo good for you–it lowers your cholesterol, is high in fiber and protein, and low in fat, it evens out your blood sugar levels and is apparently gluten-safe (although if you have Celiac disease, maybe try it out in small doses to make sure?). It has antioxidants and lignans that protect against heart disease and cancer and it enhances your immune response to disease. Then add on the nuts (Isaak is an almond man, I’m more of a cashew girl) for the extra protein and good fat, and the  B-12-full nutritional yeast. You’ll be relieved to know that sriracha is not just an amazingly delicious and spicy condiment–it actually has a ton of health benefits. Here is a very long article about this, but very briefly: (Among other things), Chili cleans out your arteries and increases your metabolism, it alleviates allergies and muscle cramps, improves digestion and helps regulate blood pressure.  So basically you’ve got a crazy-flavorful meal that will keep you going for hours, and it’s anything but bland.

Here is Isaak pre- and post-oats!

What do you eat for breakfast when you need a massive energy-boost?


Lemon-Almond Tea Cookies

Image

SF/GF

Makes 1 dozen

  • 2 cups almond meal
  • 1 tsp baking soda
  • 1 tsp vanilla
  • ¼ cup grapeseed oil
  • ¼ cup agave
  • zest from 1 lemon
  • 12 whole raw almonds for decoration (or more if you’re gonna get funky)

-Preheat the oven to 350

-Mix all ingredients except for the lemon zest. Dough should be moist but not too oily, so adjust by adding a little more oil or almond meal if necessary

-Fold in the lemon zest

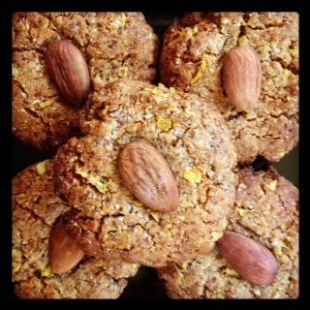
-Scoop out about 1 tbsp of dough, roll into a ball and flatten onto a baking tray so it’s about ½ inch thick. Press an almond in the middle, or get creative and press a few, making a flower!

-Bake for 7 minutes

-Remove and place in the freezer for 5 minutes

-Remove from freezer and let them finish cooling on a wire rack.

EAT. ENJOY. YUM!